Background
ActiveNav Cloud uses the concept of a Data Source as the entry point into an unstructured data repository. For example, the top folder of a user's OneDrive account is a Data Source. Each time a user is added or removed from OneDrive, there should be an equivalent update to the ActiveNav Cloud Data Source list. ActiveNav Cloud's Data Source Discovery feature helps to automate the creation of Data Sources for user centric cloud repositories.
How it works
A Data Source Discovery job is configured to connect to a host and query the repository for the list of top-level folders. These folders are potential Data Sources on that host. The discovery job compares that list with known Data Sources on that host and presents the results. There are four states for Data Sources discovered in this manner:
- Previously unseen Data Sources are reported as New.
- Data Sources that exist in your inventory and are reported by the host are listed as Unchanged.
- Data Sources that exist in your inventory but are not found during a Data Source Discovery are reported as Gone Away.
- Rediscovered Data Sources are reported when a Data Source was Disabled but has reappeared on the host.
Data Source Discovery can by fully automated, freeing administrators from making decisions about how to treat changes in the data sources. Automated Confirmation creates New Data Sources, Gone Away Data Sources are Disabled, and Rediscovered Data Sources are enabled.
Alternatively, Data Source Discovery can be configured to allow Administrators to choose what happens to each Data Source that has changed. See Data Source Discovery Results for details.
Create a new Data Source Discovery
Prerequisite: You must have a credential defined for your target host. See Managing Repository Credentials for details on how to create credentials.

On the Data Sources page and select the Data Source Discovery tab.
The Add Data Source Discovery button will present a step through wizard.
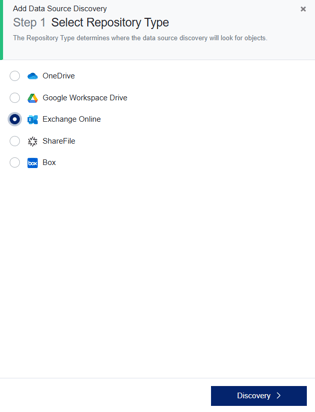
Step 1. Choose your target host Repository Type from the list.

Step 2. Enter a Friendly Name and Host Path for the Data Source Discovery. See Data Source Management for more details on how to determine the host path. If your Host Path already exists within your inventory, continue at Step 7 - Discovery Type.

Step 3. Enter a Host Friendly Name and optionally a Host Description.

Step 4. Select or add a Geographic Location.

Step 5. The Collector Group is chosen automatically by the repository type.

Step 6. Select the Credentials for the Data Source Discovery. These credentials will be used for retrieving the list of data sources on the host. They will also be set as the default credentials for the host and be used for Data Sources created by this Data Source Discovery. (See Managing Repository Credentials for details on how to create credentials.)

Step 7. Choose whether discovered Data Sources will be Discovery Only or Discovery with Feature Extraction.

Step 8. If you provide an optional Data Source Name Suffix, this text will be appended to the end of the Data Source display name.

Step 9. Optionally, provide a Recurrence Schedule for created Data Sources.

Step 10. Select the confirmation method for this Data Source Discovery. Manual Confirmation will allow administrators complete control over each change to data sources. Automatic Confirmation removes the confirmation action task and automatically assigns data sources to a default state.
| Data Source State | Automatic Confirmation |
| New | Create |
| Gone Away | Disable |
| Rediscovered | Enable |

Step 11. On the Summary page, click on the Complete button to start the Data Source Discovery.
Additional Considerations
Once your Data Source Discovery has been defined, you can perform normal administration tasks from the Data Source Discovery tab by selecting a Discovery and using the Actions menu.

Edit allows you to modify the Name, change the Discovery Type (Discovery Only or Discovery with Feature Extraction), Name Suffix, Recurrence, and Confirmation Mode.
Confirm is available when a Data Source Discovery has found Data Source changes that require attention. (See Data Source Discovery Results for details.)
Refresh All executes the discovery.
Stop is available when a discovery is in progress.
Delete removes the discovery from the list.
Schedule allows you to set the time for a one-time discovery in the future, or a recurring discovery schedule.
Copy Selected IDs retrieves the internal discovery identifiers.
Data Source Discovery Results
 Once a Data Source Discovery has completed, the details will show the changes found on the host.
- Previously unseen Data Sources are reported as New.
- Data Sources that exist in your inventory and are reported by the host are listed as Unchanged.
- Data Sources that exist in your inventory but are not found during a Data Source Discovery are reported as Gone Away.
- Rediscovered Data Sources are reported when a Data Source was Disabled but has reappeared on the host.
The Action > Confirm command allows you to choose the action to take for each changed Data Source. There are three tabs on Data Source Confirmation screen. You can select the appropriate action line by line, or use the Apply to All button to copy the action to all entries on the current tab.
- New Data Sources are added to your inventory with the Create command. The Exclude command registers the Data Source in your tenant but blocks the content from discovery.
- Gone Away Data Sources have two options. You Disable the Data Source so that the content is not re-scanned, but the current content remains in your inventory in preparation for deletion. You can choose to Ignore the Gone Away report, which retains the Data Source as enabled in the inventory. This option is useful if you suspect that the Gone Away status of a Data Source is temporary.
- Rediscovered Data Sources can be set to Enable, which returns the Data Source to your inventory, ready to be refreshed. You can choose to Exclude the Data Source which will remove it from the inventory.
The Save Progress button allows you to leave the Confirmation screen while retaining any changes to the default action. The Commit button will present a summary page before performing the actions you've chosen.

After confirming your choices, The Data Source Discovery will make the changes to your inventory and present a summary of the changes in the Data Source Discovery details.